Friday, August 8, 2014

Piet Mondrian Inspired Rhythm Compositions

I can't believe summer is almost over! I had great plans to update my blog with lots of resources and lessons that I taught last year, but clearly that didn't work! Now to share all of the fun things I did this year!

This is a unit that I did with students in grades K-1 that takes 3-4 lessons. The learning goals and objectives for the unit are the same for all grades: to create simple rhythmic compositions and to relate music to other subject areas (in this case it is art). I cannot take credit for this idea, it belongs to the shared efforts of my two lovely co-teachers!

Piet Mondrian is a Dutch artist who is famous for his simple paintings that use grids and mostly primary colors (red, blue, yellow). This is Mondrian's most well-known painting Composition with Red, Blue and Yellow.

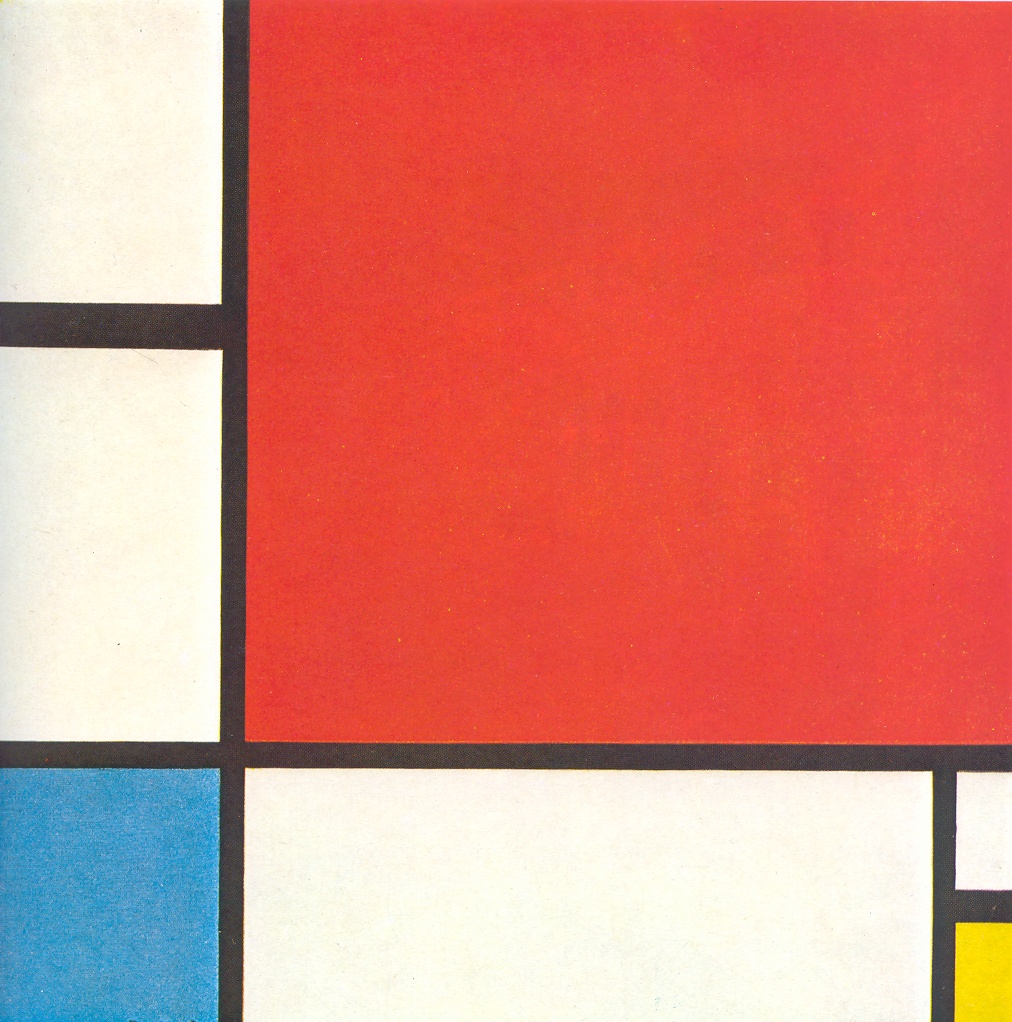
Students use Mondrian's artwork as inspiration to create a simple rhythm compositions with the colors red, yellow, white and blue. The number of syllables corresponds to a note or rest depending on the number of sounds each student makes. Red is a quarter note, yellow a pair of eighth notes, white is a quarter rest. (Side note: I also did a shortened version of this unit with 2nd grade where I added in blue for a half note. Since they have already done this unit in Kindergarten and 1st grade, I don't spend time going over much background information and jump in with reading rhythms and their compositions.)

For students in Kindergarten and 1st grade we spend the first day learning about Piet Mondrian and looking at his artwork and seeing how it has changed throughout his career. We also spend time listening to music that matches the mood of the artwork and moving to show different aspects of the painting (tracing leaves, showing falling snow, tracing gridlines, etc). 

The second day students learn what it means to be inspired and how we are going to apply that to music and rhythm. I found that the most challenging part is getting students to understand beat values of each note and rest (excluding the half note).  In the flipchart, you'll find a page when you can compare the outlines of each box to show that they are all one beat. You will always have those few students who think that a quarter rest is worth "zero beats," but this really seemed to help them understand. Once we explore beat values, we read and perform patterns found in the flipchart as well as making our own patterns, then performing on different instruments. I use hand drums for quarter notes and rhythm sticks for eighth notes, but you can use whatever you want!

For the third (and probably fourth) day of the unit students get to create their own rhythm composition using colors red, yellow, and blue. The worksheets K and 1st are the same, but I ask for different things.

For Kindergarten, students just use colors to create a rhythm pattern and when they perform the pattern they need to clap and say the colors to a steady beat for an easy performance assessment. First graders color in the beat squares, but then draw the matching note or rest on top of the color and perform it for an assessment. This is the K/1st worksheet: 
I have some rules for students when completing the worksheet. They must use each color and the four boxes on the left must be different from the four boxes on the right. Once students complete the 8 beats across, I have them copy it into the boxes underneath and cut their paper on the dotted line. They get to take one home and with the bottom half I create a class compositions with all the students on a large sheet of butcher paper for the teachers to hang in their classrooms.
The students really enjoyed completing this unit and creating their own rhythm patterns. I have attached links to all the materials below! Below is a link to the ActivInspire Flipchart that I used with the kiddos in class. Be sure to check out the notes browser for more information about listening files and different features in the flipchart. 


Enjoy!
- Alena


Sunday, September 22, 2013

Back to School!

Getting back into the swing of a new school year is tiring... phew. This fall I started at a new school, which I am incredibly thankful for now being at one school, it is kind of like starting all over again. That being said, I realize that I have been slacking with blogging. My goal for this school year is to actually bring all of those pinterest ideas I've been collecting to life in my classroom. So look for more updates coming soon!

Sunday, July 7, 2013

Melted Crayon Art! (Easy DIY Craft!)

I have wanted to make a melted crayon art project for a while now (Thanks again, Pinterest). Today I finally had time to make one and it was suuuuuuuper easy and the entire process only took about an hour. And I used all the old remnants of crayons from my classroom that would have just ended up being thrown in the trash (Bonus Zen Points for helping out Mama Earth!).

What You'll Need:
- A Canvas/Background or whatever you want to use for the back
- Crayons (I used about 40+)
- Hot Glue Gun
- Newspaper
- Silhouette Template
- black sharpie, pencil
- scotch tape
- hair dryer

1. Get your backdrop ready! Most of the projects I've seen on Pinterest use a white artists canvas as the background (You can find these at Michaels for under $10). I didn't have a canvas (and didn't feel like running out to get one) but I did have foam core board, which I liked because you can easily cut it to exactly the size you need with a yard stick and an X-acto knife! So I cut my board in half to start.
2. Find a silhouette (if you want one).  I saw really neat projects that had a silhouette on the backdrop in black to add something different to it, so I hit Google Images and found one that I liked of a couple standing underneath an umbrella. After some screen snapshots and resizing of the picture, I printed it out and then carefully cut it out (use a good pair of scissors or an X-acto knife here). Then I positioned it on my background and traced it with a pencil. Once I had a good tracing I colored it all in with a black Sharpie.
Cut-Out Template
Final Traced Silhouette
3. Sort Crayons & Glue to Background.  Depending on how you want your final project to look you can use all one color, or different shades of blue, or all the colors. I arranged mine into rainbow order and then used a hot glue gun to attach them to the foam board.
 
4. Set up Work Area! I've read from other bloggers and pinners that the melted wax can splatter a lot and I didn't really believe them until I did this myself. It splatters A LOT so I was glad that I set up the area for the project by taping some newspaper to the wall and floor (tape it because the air from the hairdryer will want to blow it around). And last thing for prep: if you're using a silhouette you need to cover it up to keep the crayon drippings from getting on it! I covered mine with strips of scotch tape, but I bet blue painters tape would do the best job!
 
5. Melt Crayons!!! I had my hairdryer temperature set to hot and the speed to high, which seemed to be the best way (even though it splatters). Setting your hairdryer to a low speed didn't seem to work in melting the crayons and I'm sure it would take much longer. Point the hairdryer about the middle of the crayon wrapper pointing down to help make form the drops into streams going down. It takes a while for the crayons to get hot enough to melt, but once they do they melt quickly so be ready.


Once your crayons are done melting you need to let the wax dry for about 5-10 minutes, then you can peel off what you used to cover your silhouette and you have your finished product!
 
Here is mine!


Friday, June 28, 2013

The Partners Nightmare...Solved

Me: "You're going to be working with a partner..."
Students: "I can't work with him..."  "No one wants to be my partner..."  "Can we have a group of three?" "You chose the groups? That's not fair."

It happens to me all the time and by the end of the year it drives me NUTS. I spent a ridiculous amount of time on Pinterest looking for different solutions to my problem. We all know the popsicle stick system of drawing out names from a cup and pairing up the students. Problem: This works well for a classroom teacher, but not so well for a specials teacher because I have over 200 students and I am not writing students names on 200 popsicle sticks (horribly time consuming and wasteful). One idea that a teacher friend shared with me was a partner wheel with half the students names on the outside and the other half on the outside, spin the wheel and it matches up partners.  So then I got to thinking about how I could adapt this to work for me (because I'm not making 15 different partner wheels for each class) and couldn't come up with an easy solution. So now I have partner cards!

I stole this idea from an awesome fellow music teacher Jackie (read her blog! Lots of healthy & yummy recipes! http://quarternotecafe.blogspot.com/), who stole it from her awesome co-teacher!

The system uses common pairings & duos from daily life, movies and tv (e.g. macaroni & cheese, Batman & Robin, Tom & Jerry, etc.) that can also be used as a way to put students in groups of four using common themes (e.g. Disney Group: Lilo & Stitch and Nemo & Dory).

Here are the cards for the "Muppet" group of four, the partners are Kermit & Miss Piggy and Bert & Ernie!

When getting students into partners or groups of 4, pass out a card to each student in a random order. Then it is the students' job to find their match/group and there is no complaining about groups because it is 100% up to chance.   You can also use this idea to keep track of what groups are doing what in terms of projects/ activities, etc. Or an easy way to randomly choose students/pairings to share with the class (after students get into their groups turn in their cards and pick then randomly from the deck). I would laminate all the cards before using them to make sure they last (and because I love the laminator!) and the "cheat sheet" (for both you and the students). You can find both items as PDFs below!


Partner Cards  https://docs.google.com/file/d/0B2lupteVxMifNU1Rb19FdDFMams/edit?usp=sharing

Partner "Cheat Sheet"  https://docs.google.com/file/d/0B2lupteVxMifTzl0RFVVSTdaUFE/edit?usp=sharing

P.S. Sometimes I have classes of 30 students, so I expanded the Disney grouping with a third pair, making a group of 6!

Tuesday, June 25, 2013

Tempo Run Game!

I am constantly amazed by how much my students know about technology, especially when it comes to their smartphones. And let's be honest, how many people use their smartphone only for email, news, etc.? Everyone has games on their phones, and for me I could play Temple Run (and it's many versions...personally I love the Brave one...) for hours. So using the fast-paced theme of Temple Run, I made Tempo Run as a game f-or students to build accuracy and speed in identifying pitches on the treble clef staff. (I know it has nothing really to do with tempo, but Pitch-Naming Run doesn't quite have the same ring, eh?)

I can't take complete credit for this idea, because I saw it on Pinterest, but I saw it and thought, "Hey, my kids would LOVE this!" The original post (link found below) was to an actual computer program and powerpoint, which would have been useless to me because I wouldn't be able to download a program on my school laptop and I don't use PowerPoint. So I took the main concept of the game and created an ActivInspire flipchart for the game. In the game there are two stages, each has a time limit of one minute to correctly name all the pitches. Stage one has 10 pitches and stage two has 15. In order to pass a stage, the student must correctly identify all pitches by their letter name within the time limit. At first I was using the timer on my phone to time the length of one minute for each stage and then I thought, "This would be even cooler if I used the running music from Temple Run!" So after some digging, I found the running music from the game and IT IS EXACTLY ONE MINUTE. Goodbye timer!

Since this might be easy for some students, I am working on more stages and will update soon!

Enjoy! :)

Click Here to download Tempo Run from Promethean Planet

Original Link to Game (a paid download from Teachers Pay Teachers)


Sunday, June 23, 2013

Online Behavior Management

If you haven't heard of Class Dojo, then you need to. I LOVE THIS WEBSITE. Thanks again to the fabulous technology people in my district, I learned about this website, embraced it, love it and I use it every single day.

The concept is simple, every student in your class has their own monster/avatar. During class a student can either earn or lose points from their monster depending on their behavior choices. The first thought that went through my head (and possibly going through your head right now) was "Great... something that works for classroom teachers but would be a nightmare for a specials teacher." Well I am here to tell you that YOU ARE WRONG.

The website is simple to navigate and you can create as many classes as you need (I have one for every class I see). Once you create a class you can import student names from class lists and VOILA! Everything is ready to go! If you're still not convinced, let me show you how it works. Below is a snapshot of my homepage once I log in to the Class Dojo website that shows all my classes. 
For an example, let's say I have Mrs. Fogle's class right now. I would click on the start button and then this would show up. Every student has their own monster! And they LOVE seeing what their monster is!  
My personal routine is to have this page open on the screen as students enter the class, which is a great non-verbal cue to let students know that I am already looking for who is making positive choices from the minute they enter the music room. To award a student's positive behavior simply click on the student and the "Give Award" window appears. From this window you can add either a positive or negative point to a student's monster. I personally love the great sound effects that go along with the positive/negative, GREAT non-visual cue to keep students on task. Another thing that I love about Class Dojo is that you can personalize different student behaviors to make them applicable to you, which I love because I rarely need a "forgot homework" behavior. My school is a PBIS (Positive Behavior Interventions and Supports), so we have a simple school motto that we call the 3 R's: Be Respectful, Be Responsible, Be Ready to Learn. I like to keep things simple so most of my positive/negative awards are simple too.


My negative behaviors are basic expectations I have of all students, but the positive need some explaining. Everyday I am amazed at the insights and observations of my students, which led to the Bright Idea award; One of my focuses this year was to build students' analytical listening skills (which is always a struggle) which led to the Good Listening award. And finally, my own positive behavior system is to choose a class Rock Star at the end of class, so if I see students who are making positive choices across the board, I'll award them the Rock Star Choice award. Quite simply, at the end of music class, the student whose monster has the most points is that day's Rock Star, where they get to write their name on a star cut out and hang it up on the Rock Star bulletin board.

There are tons of ways you can utilize this resource, so I listed some of the ways I use them below.

  • Students can change their monster if they have at least 5 points by the end of class
  • Students must have a certain positive rating on their report in order to participate in centers
  • Need to pick who's going first in a game, activity, etc? Click the random button! 
  • Download the mobile app on your smartphone or tablet! Great for when you need your projector for instruction.
  • View student point totals and allow them to cash them in for prizes at the end of each quarter or term
  • For class-class competitions, the class with the highest positive percentage gets an award
  • Many, many more!
Want to hear the best part about this resource? IT'S FREE! :)

ThingLink - A Great Online Resource

Next year, my school is going to be completely wireless (thank God!) as part of a BYOD (Bring Your Own Device) program spreading across my district. BYOD means that teachers and students can bring their own mobile devices (tablet, smartphones, etc.) to school to utilize in instruction. In order to prepare for this, during the past school year our specials team professional development has been focused on technology use in the classroom where I learned about lots of free online resources that you can use in the classroom and students can easily access at home. One of the BEST things I've found is a website called ThingLink.

ThingLink allows users to create interactive "touch images" that allows you to collect web-based resources (websites, YouTube links, flickr images, etc.) in one place that you and students can easily access. When first looking at a ThingLink Image it looks like a plain old picture. But when you scroll over it different icons appear (VOILA!) showing links to online resources that you can then click on and explore. It sounds complicated, but trust me it isn't.

One of the touch images I've created on ThingLink was to help enhance a 5th grade unit study on composers. I started by making a collage of nine different composers I wanted the students to explore on PicMonkey (another great, FREE resource for photo editing) and uploading it to ThingLink.
My composer collage made on PicMonkey!
Once the image is uploaded, you can add "touches" to different areas of the image. For this specific image I added two links to each composer, one that links to a kid-friendly composer biography and the other to a YouTube link of a listening example. 
Adding a tag to an image, suuuuuper easy! 
Once you have added all your tags/links, save your image and you are ready to go! 

What I like best about ThingLink, is that the YouTube links open from the ThingLink page, not from YouTube, which helps to prevent those annoying ads from popping up and playing when you're trying to watch a video. And it has a free mobile app that you can download on your iPhone. One of my goals for this summer is to create useful ThingLinks that I can use to help enhance my instruction for next school year, so look for more to be added as the beginning of the school year approaches! I added links to three different touch images I've made already, the composer one from this post, The Orchestra (useful for instrument families and individual instruments), and The Carnival of the Animals (I used it for a review with my Kindergraten classes after we did a unit study on the music).

My ThingLinks!